Oh boy. Sometimes you start a job and soon think to yourself; "I must be crazy.". Today has been a bit like that! To be fair though, I knew damn well what I was getting myself in for...
I was originally going to start work on building the beach up around the lighthouse, but due to the cold weather (that made the room that the layout currently lives in pretty chilly), I decided to make a start (at long last) on the grounded railway carriage. It's not based on a particular prototype, but rather an appropriation of pre-grouping 4 wheel carriages. At the end you'll see my mistake, but for now let's start the 8+ hour journey of building the basic shell!
Above: So, the first step was to begin marking out onto the balsa wood (the balsa was cut out a few days ago, but I wanted to keep everything in one post). For this I found a spare compass point, but you'll see why I changed to a sharp blade instead later.
Above:You can begin to see the slight problem with using the compass point - all lines going against the grain are somewhat imprecise. Note the steel square for keeping everything straight!
Above: After about an hour and a half (yes, really!), the lean-to extension was marked out. The ruler should give an indication of how fiddly the process was. (Thank goodness I'm not modelling in a smaller scale!)
Above: A while later, I decided to begin on the back side of the grounded carriage (Which won't be visible really) to experiment with using the Dremel (with tiny router bit) to carve out the panels and windows. I soon realised that the result was... somewhat messy. Not only was it hard to get into the corners, and also to keep the depth consistent; but the other difficulty with this method was that the balsa wood is so soft that it can be difficult to feel when you're actually cutting into it!. I'll come back to the solution in a bit, but first...
Above: ... it was over to my dad (with his carpentry expertise!) to carefully form the curve at the bottom of the carriage. As you can see, he first used a small plane to get the majority of the material off, then went over it with a bit of sandpaper (wrapped around lollipop sticks; yet another use for them!) to form a smooth curve.
Above: After that was done, he kindly began to mitre every corner (using a 45 degree angle guide, a sharp craft knife, and then sandpaper).
Above: Which meant I could carry on with the scribing. After the messy outcomes of my first methods, I decided to use that same sharp craft knife instead of the compass point. The result of this are much cleaner lines.
Above: And after a bit of thinking, I experimented with some precision (flathead) screwdrivers to carve out the windows and panels. I first tried using them like a chisel, but the balsa wood was too soft; I would quite often end up taking off chunks. A bit of head scratching later and then it became obvious - use the soft balsa to it's advantage; its softness! The solution was to press and drag the screwdriver into the balsa (of course, being very careful, and only going with the grain direction).
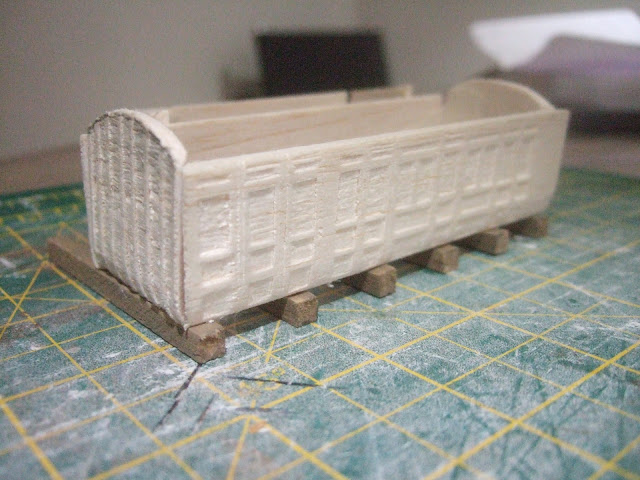
Above and below: And many hours later, I finally finished all the carving out. The result doesn't quite stand up to close scrutiny, but the results aren't too bad considering! You can probably see the mistake I made; with the original drawing, I made little allowance for window and door frames! The result of this is that I could only fit in 3 of the 4 passenger compartments. I'm currently undecided whether to just cut off the last centimetre or so, or add in another door and small window (guard/brake compartment?!). So far I haven't seen any examples of such a small compartment, so I'll probably end up just cutting it off.
The rest of the images below: And here we have today's work, all loosely held together by masking tape. I'll obviously need to add in a longitudinal beam underneath the carriage sides, but other than that, I think it's looking OK.
Obviously the windows will need to be fully cut out, but I think the real test of "Will this work?" will be when it comes to painting it. I'm actually pretty nervous, as I'm really not sure if it will end up looking like I hope it will. I'm undecided, but my current thinking is that the bottom half (below the windows) will be painted a pale blue, and the top half white.
Anyway, realistically I only have 4 days left to get the layout to a presentable state; so I'm going to have to start ballasting, building up the beach, and adding the 'water' tomorrow!


Comments
Post a Comment