If I can build it...
...then so can you! Seriously though, whilst the 3D design could put some people off straight away, in reality the woodworking is not complex at all. Each leg is made of 4 lengths of wood; no fancy joints necessary, only glue and screws!
True to most designs, the construction has shown that a few changes would need to be made. The main difference is that instead of screwing the bottom leg braces onto the face of the uprights, I've had to screw them between the uprights instead because the hinges are wider than the uprights; thus I need something to screw the rest of the hinges onto! A more minor difference is that the platform is a little bit longer to make up for using materials slightly wider than planned... oh and also because I was fed up of cutting ply with a tenon saw, so I left the extra few centimetres(!):

Not the best choice of saw, but it was either this or wait 5 hours for dad to get back! Surprisingly though, even with my terrible accuracy for sawing, I (eventually) managed to cut a straight line. Happy days!

The two legs were cut out in a much more timely manner. The notches in the top braces were simple to cut; first the two edges were sawn down to the correct level, then multiple cuts between the two were made to break up the notch into many segments. With a wobble of the saw and a few quick (and careful!) knocks with a mallet and chisel, the notches were finished.

And just to ensure that I wasn't slacking off, our cat, Freda, was on site! This won't be her last appearance either...

And here we have all the components cut out and ready for assembly. An important thing to note is that the crossbeam (at the top of the photo) hasn't had its notches cut out yet. This is a job I purposefully left until last; I didn't want to cut the notches too early and realise that they were not quite in the right place after I had assembled the rest of it.

This crude close-up shows that every screw was countersunk into the wood; I like to do this wherever possible (i.e. whenever the wood is thick enough), not only because it looks neater, but also because it reduces the risk of things getting snagged on screws that poke out! The top braces were only screwed, whereas the bottom braces were both screwed and glued; I figured that screwing into end grain was not enough to ensure rigidity of these crucial joints.

By the time I resumed work after dinner yesterday, it was getting dark, so there are no photos of the rest of the construction process (so instead here's a photo of Freda sat on it again!). That said, there's nothing much to explain; the ply base was simply screwed onto the battens, holes drilled for the castors to sit into, and the hinges were attached (by my dad to save time due to fading light). The crossbeam could then be marked correctly, and the two notches cut out.
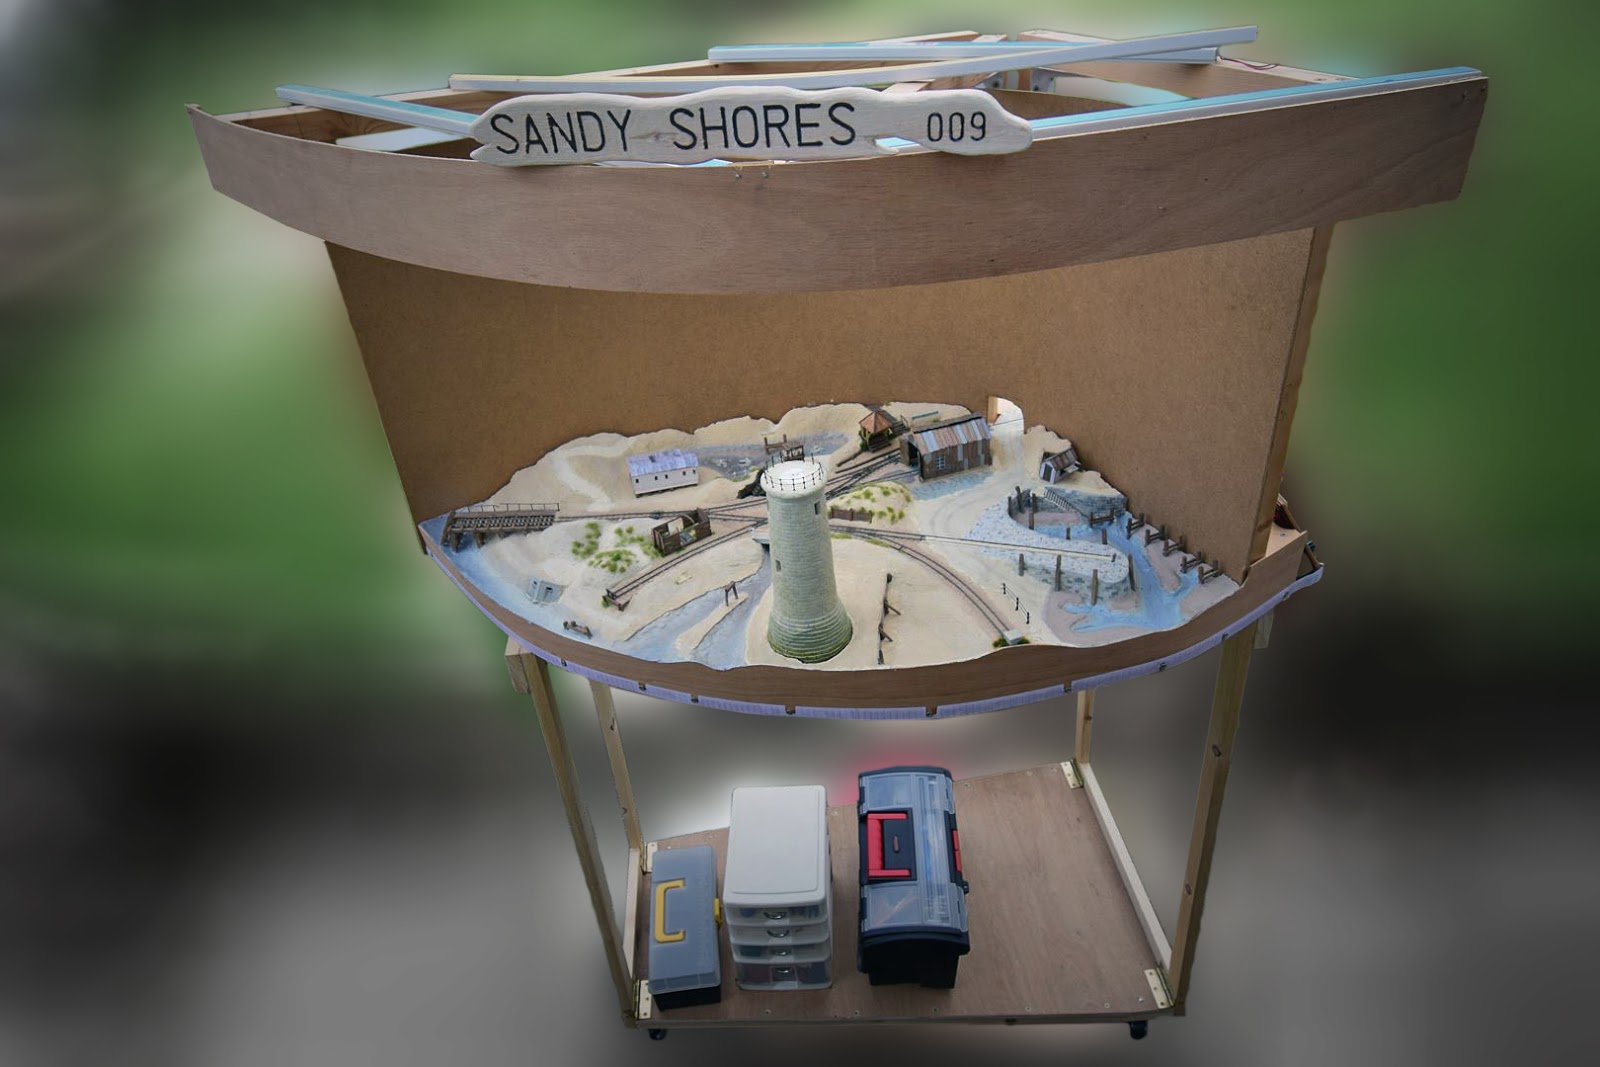
Fast forward to today; and after hours of rain, eventually the sky cleared for long enough to rush outside with the whole layout and its associated paraphernalia in order to take photos. I also took this opportunity to weigh the various components, but first, here's the (almost) finished trolley in its folded state:
Fast forward to today; and after hours of rain, eventually the sky cleared for long enough to rush outside with the whole layout and its associated paraphernalia in order to take photos. I also took this opportunity to weigh the various components, but first, here's the (almost) finished trolley in its folded state:

And to give an almost complete view of the paraphernalia associated with this layout:

Don't worry, it's not as bad as it looks! In fact, the layout can be set up very quickly; probably in less than 5 minutes (although I haven't timed myself). Here's the rough sequence:

Happy with the trolley, I assembled the layout back into my room, where I began tidying up. I then found some collapsible hinges from a project never started; perfect I thought, I could use them to make a drop-down tea & cake tray (and maybe also rolling stock if I can find some edging strips)!
And an hour later, here is the result. It ain't pretty, but it works (and what's more, it's below the control panel on the wider leg which means the trolley will still fold up properly):

And yes, the control panel needs a lot of attention; a new legend printed (as the old one has curled and faded immensely) and the CDU glued back into place!
Oh, and here are the approximate weights for the layout components:
Layout: 11kg
Trolley: 8kg
Pelmet & lighting rig: 3kg
Backscene: 2kg
In total, that's 24kg; still 1kg under my "portable" MIDI (music) keyboard! Obviously that doesn't include stock and buildings (not that I'll be carrying everything in one go!), but I still think it's not an outrageous weight. Sure, I could've used lighter materials (i.e. plaster instead of clay), but the layout isn't particularly big; and as I'm the one who has to transport it and put it up/take it down on my own, if I'm happy then realistically that's all that matters!
So, whilst I don't think it'll win any woodworking awards, it works as intended! Just don't look too closely... seriously, don't!...
Comments
Post a Comment