I can't quite believe it; the last time I did any personal modelling was January 5th 2020. What's more, during that time the creation in question (Sandy Shores' storage box) has since been broken up! Commission work for BRM has, understandably, taken up my modelmaking time - yet I would never complain as I enjoy it so much, and it helps me to become a better modeller. Anyway, with no exhibitions to attend since ExpoNG in 2019, Sandy Shores has been left untouched in my bedroom. I've had it set up (minus backscene and lighting), but not once in all those years have I felt compelled to plug it in and operate it, let alone work on finishing touches and general maintenance.
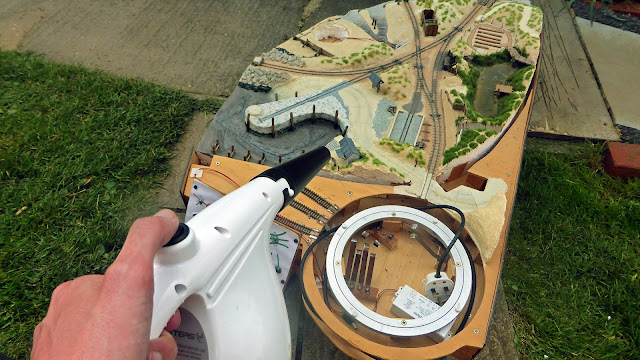
That is, until I realised it was less than a week to go until Narrow Gauge South! So, it's time to tackle all the niggles that have cropped up over the years, and get the layout fit for exhibiting. The first job is to get rid of the dust and cobwebs...
Above: Sandy Shores' 'traintable' fiddle yard has rusty steel contact wipers (on the right), with the turntable itself having tape covering half of each of the copperclad panels (left) due to making them too large in the first place!
With the dust unsettled, the first proper job is a major one - the fiddle yard. Whilst it worked flawlessly when first built, over the years it became completely unreliable, and after ExpoNG in 2019 I vowed to sort it out... except I never did! Looking at the wiper contacts underneath (sprung steel, IIRC), they are clearly rusty and most don't appear to line up with the copperclad panels underneath the turntable itself. What's more, the electrical joints are clearly tarnished from the use of flux and generally don't look great!
Whilst research on other methods of providing electrical connectivity (sprung ball-bearing plungers and microswitches) was carried out, I either couldn't find any suitable, or they cost a bomb! In the end I decided to keep things simple and just re-make the contact wipers - after all, they worked initially.
Above: With holes for the feet and copperclad panels cut out, the template can now be used to mark where the wipers need to be located, and at what height. The red arrows on the left denote the holes with the feet of the lazy susan sticking through. Note the yellow masking tape on the right hand photo temporarily holding the new wipers into place until I was sure they were correct.
Instead of sprung steel, the new wipers are strips of 0.3mm phosphor bronze (ordered from Eileen's Emporium). One end of each wiper was bent in a curved shape, although in hindsight an upside-down V shape would've been better as it would prevent the wipers snagging on the edges of the copperclad board. I did however go back and slightly lessen the curve, which did seem to stop the snagging.
Above: The rolling stock for Sandy Shores isn't exactly varied, but that's why removable wagon loads are important!
The next important task was to sort out couplings. As it turns out, having coupling loops on both ends of every wagon caused nothing but problems at shows. The problem was worse on the crossing, though not because of the crossing itself, but the curves either side; these would cause the loops to lock together, and thus derail certain combinations of wagons (particularly as there are multiple coupling varities) on the straight section in-between. The loops on the Roco, Peco, and Dundas wagons were fairly straightforward to remove, but the Greenwich couplings on the flat wagons took more effort. The coupling had to be pulled completely off the flat wagons (luckily, they are an interference fit), and the loop locating pin needed to be straightened. Then, the pin could be pulled out and the loop removed. I broke one of the flat wagons by not pulling the coupling out first - still, it's now going to be placed upside-down as an abandoned wagon in the dunes. Funnily enough, that's a similar scene to a photo used by Mark Greenwood to work out the buffer design from one of the prototype wagons - albeit instead of a sand dune it's deep within Fawley oil refinery!
Another important task is wheel cleaning. Yet, I have something awful to admit; this is my first time cleaning rolling stock wheels (yes, even locos)! I don't know why it never occurred to me to clean them - after all, I always clean the track they sit on...
Above: The comparison before and after, and the improvement in running qualities makes the tedium worth it. I was, particularly for the two locos, very cautious of the splintering fibreglass fibres, so a vacuum cleaner was on constantly whilst cleaning the locomotive wheels. For the wagons, I just wore gloves and vacuumed at the end of the process. I figured it would be wise to take precautions! Before you mention it (because I know someone will!) I do know that you can get Trix/Gaugemaster brass locomotive cleaning brushes that do all the hard work for you, but for the time being this will suffice - especially as I only have two locos.
Above: The original softwood crossbeam (top right) snapped at some point, resulting in a large split down much of it's length! It had to be replaced entirely with a piece of sturdy ply.
My Dad kindly cut out a new piece, this time from a bit of 18mm ply (as you can see, it used to be the leg of the 'Ashlett Creek' board of Old AGWI Rd.). After much fettling, it now fits in place almost perfectly (I say 'almost' because it can still easily get wedged and require a firm hand to remove/fit - but that's better than it being too loose!). Needless to say, I couldn't leave it unpainted, so I set about giving it the customary coat of dark grey paint. For the first time in my life, I used a foam brush to apply paint, and I have to say it was much easier to get a non-streaky finish.
Other smaller, less important tasks included:
Above: A lifesaving ring was fitted to the quayside (salvaged from Calshot MKII).
Above: The bogie securing nuts of this Parkside Dundas bogie wagon always came off (as they do on the 'ambulance wagon' which I seem to have lost...). Before I could reattach them, I realised that I had never added proper couplings since I built the wagon 10+ years ago! Happily, the Greenwich couplings seemed to be at the right height when glued to the top of the bogies, but that would mean a washer would be needed to provide enough clearance. Once everything sat correctly without the bogies and coupling binding, the nuts were glued tight using cyanoacrylate (which was also used to glue the couplings on themselves). Oh, the sprue with the bit of Blu Tac on the end is to help me put the fiddly nuts on without the need to tear my hair out!
Above: Next up, the trestle buffer needed to be repaired (for the umpteenth time). Two bits (as per the arrows) needed to be reglued. Looking at it now, one of the main posts also appears to have broken, so a bit of paint will need to be applied to tone down the raw wood. Note to self: in the future, don't build a fragile structure right up against the baseboard edge!
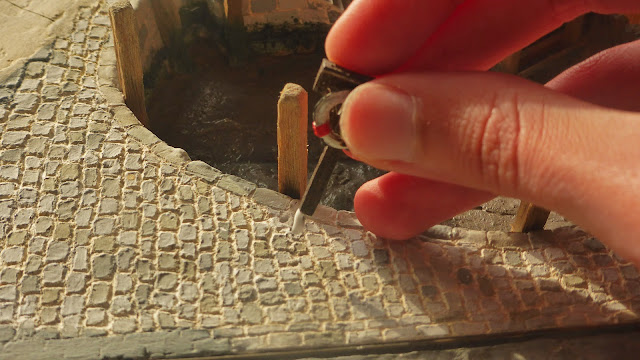
Above: Another job was to remove excess clay/plaster from the flangeway on both the loco road, and the quay siding. For years I thought it was the surface either side of the railway being too high, but on closer inspection I noticed that it was actually the wheel flanges that were hitting something. Finally, locos no longer stall at both locations! Such a simple fix, but one I just couldn't fathom for some unknown reason... anyway, paint was then applied to cover the raw white plaster/clay - good as new!
So that's about everything for now - still plenty of things (especially details) I could add for future shows, but maintenance and getting everything working is far more important. Being limited on time, I had to prioritise what got done, and what could wait until after the show.
Speaking of shows, the next booked appearance (a last minute one!) will see Sandy Shores being exhibited at the Salisbury & South Wilts Railway Society Exhibition on the 21st/22nd May at the Michael Herbert Hall, Wilton (near Salisbury). For full details, see their website here.


.jpg)
.jpg)
.jpg)
.jpg)
.jpg)
.jpg)


.jpg)

.jpg)
Comments
Post a Comment